

Overview
Gemini Enterprise CX is Google’s platform for building customer-service agents (the successor of Dialogflow CX; the agent builder is called CX Agent Studio). Cekura connects to it the way Google recommends: no key file leaves your Google Cloud project. Instead, you create a small read-only service account in your project and allow one Cekura identity to act as it. Cekura then asks Google for a short-lived token each time it needs to read your agent, and Google checks your grant every time. Removing the grant cuts Cekura off immediately. Once connected, Cekura can dial your agent’s phone number to run scenarios as a simulated caller, and can read the agent’s conversation history from Google for observability.This guide covers voice agents reached over telephony. Text testing of Gemini Enterprise CX agents is not supported yet.
Prerequisites
- A Google Cloud project that contains your CX Agent Studio agent, and its location (region), for example
us-central1orglobal. - Permission in that project to create a service account and to edit its permissions (the Service Account Admin role, or Owner).
- A phone number attached to the agent, if you want Cekura to place test calls.
How the connection works
Cekura’s identity is a Google service account that Cekura owns, one per Cekura agent. It is created when you click Get Cekura identity on the agent form, and its address looks like
cek-p<n>-<six digits>@<cekura-project>.iam.gserviceaccount.com. Only that address can use your grant, and Cekura accepts it only for the project it was issued in, so an identity can never be reused by another customer.
Connect the agent
Everything happens on the agent form in Cekura and in Cloud Shell (the>_ icon in the Google Cloud console). The setup card on the form shows the same commands as below, with your values filled in as you type, and each has a copy button.
1
Select Gemini Enterprise CX
In Cekura, go to Agents, create an agent, and select Gemini Enterprise CX. If you don’t see it, click More options to expand the full provider list.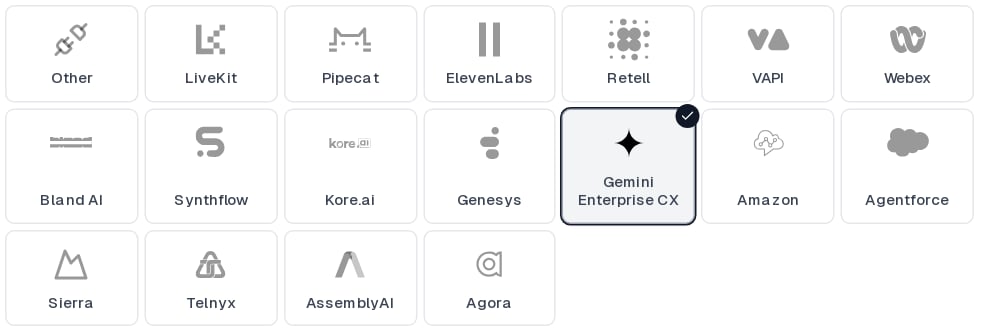
2
Create the reader in your Google project
A small service account in the project that contains your agent, with the read-only Gemini Enterprise for Customer Experience Viewer role (Do not create a key for this account. Cekura never needs one.
roles/ces.viewer): it can read agents and their conversations, nothing else. Run this in Cloud Shell as someone who can create service accounts there:3
Get the Cekura identity
Back in Cekura, click Get Cekura identity on the setup card and copy the address it shows. This is the Cekura account that will act as your reader.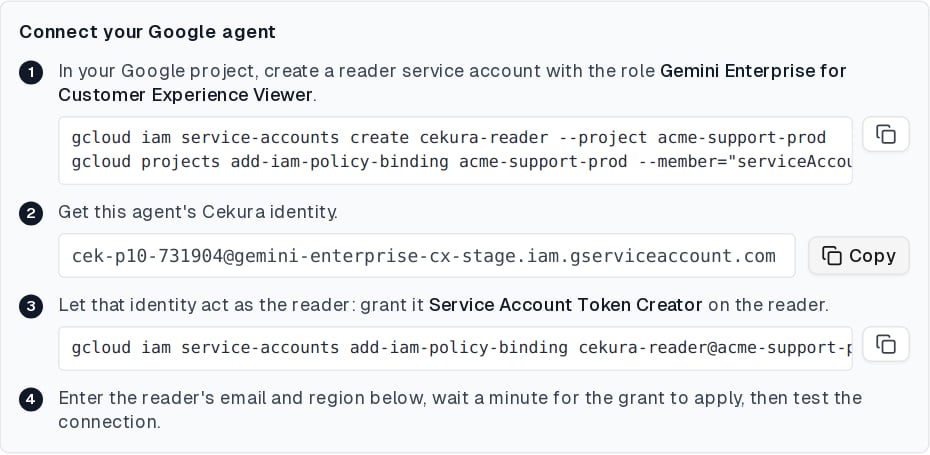
4
Allow the Cekura identity to act as the reader
This is the only link between your project and Cekura: it lets Cekura request tokens that act as the reader, and nothing more.Prefer the console? Open IAM & Admin → Service Accounts, click the reader, open its Permissions tab, click Grant access, paste the Cekura identity as the principal and choose the role Service Account Token Creator. Note two things: the grant goes on the reader’s own Permissions tab, not on the project’s IAM page, and the role must be Service Account Token Creator. Service Account User or Service Account Admin do not work. New grants take up to a minute to apply.
5
Enter the agent details
Fill in the fields under Integration Settings: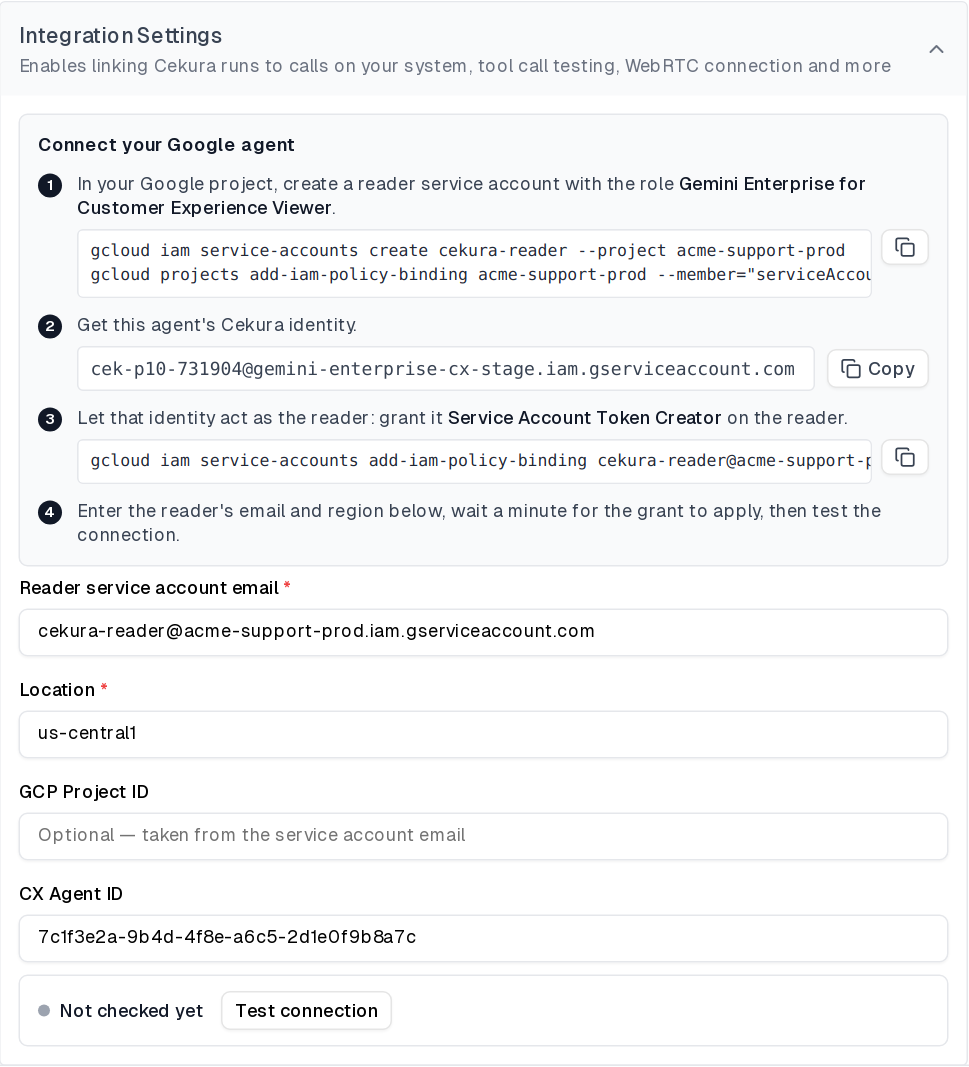
6
Test the connection
Click Test connection. Cekura asks Google for a token acting as your reader and shows the result. Connected means the grant works. Not connected shows Google’s answer and what to check.
7
Add the phone number
Under Connections, Telephony is on. Enter the phone number attached to your agent under Telephony Settings. Leave Inbound on so Cekura dials your number.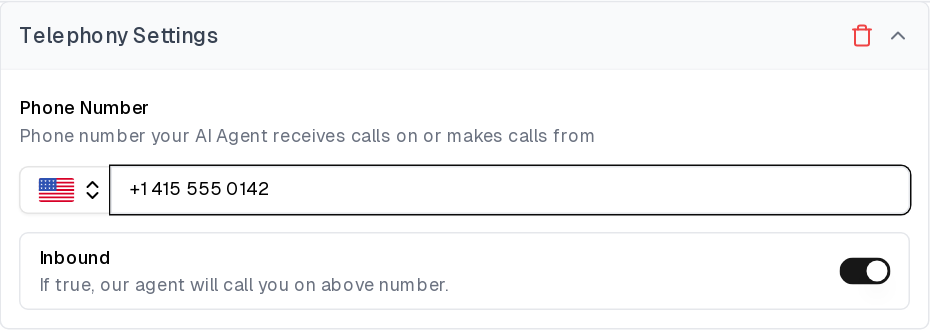
8
Save the agent
Finish the form and save. The Cekura identity and the connection status are stored with the agent, so you can see when it was last checked and re-test at any time from the agent’s settings.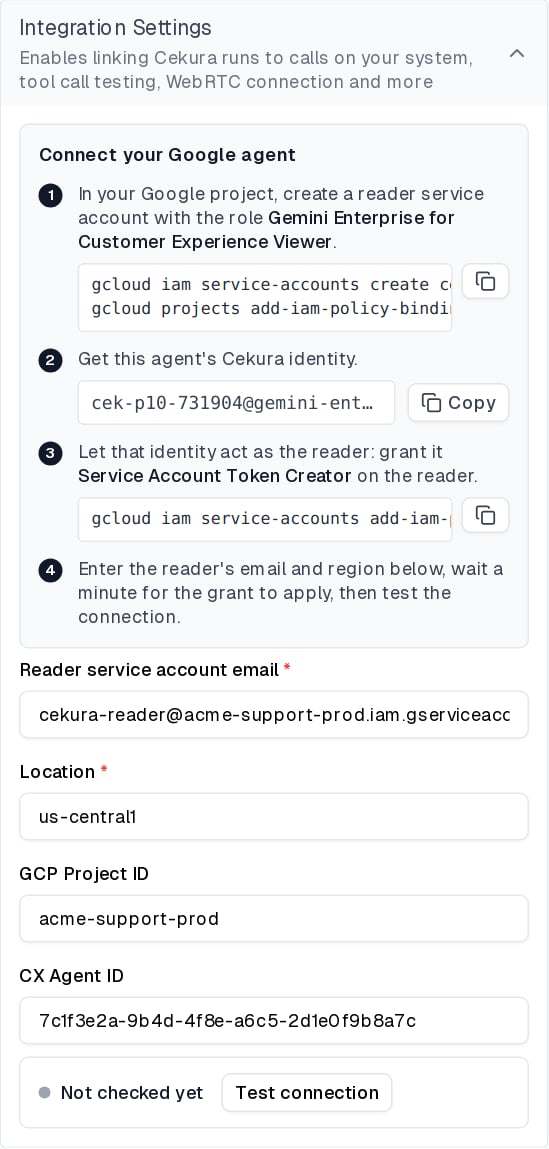
Run a test
Open an evaluator, click Run, and start the run using the Telephony connection. Cekura dials your agent’s number and plays the scenario as the caller. The result shows Cekura’s transcript of the call.Troubleshooting
- Not connected: Google refused to let … act as …: the reader has not granted the Cekura identity shown on the card, the grant names a different address, or it was given a different role. Check the reader’s Permissions tab: the Cekura identity must be listed with Service Account Token Creator. Wait a minute after changing it.
- The service account belongs to project X, not Y: the GCP Project ID you typed does not match the project in the reader’s address. Clear the field to use the reader’s project, or enter the project that actually contains the agent.
- This Cekura identity was issued for a different project: the address was copied from an agent in another Cekura project. Click Get Cekura identity on this agent’s form and grant that address instead.
- Cekura’s Google identity is not available right now: Cekura’s side is not configured for Google Cloud in this environment. Contact Cekura support.
- Revoking access: remove the Service Account Token Creator grant from the reader, or delete the reader. Cekura’s next request is refused by Google.
Configure through the API
When creating or updating an agent through the API, set the provider togemini_cx, put the CX agent id in assistant_id, and pass the access details:
project_id inside gemini_cx_data is optional and defaults to the project in the reader’s address. Nothing here is secret. The Cekura identity is issued from the dashboard: open the agent’s settings once after creating it to see the address to grant; it is then reported in gemini_cx_data.cekura_identity. The read-only gemini_cx_connection field on the agent reports the last connection check: status (not_checked, connected or failed), checked_at, acting_as and error.