Overview
Mock tools allow you to simulate external tool calls during agent testing by providing predefined input-output mappings. This ensures consistent, predictable responses during testing scenarios, making it easier to evaluate your agent’s performance and behavior. Mock tools are particularly useful when:- Testing agents that rely on external APIs or databases
- Creating reproducible test scenarios
- Avoiding dependencies on live third-party services
- Testing edge cases with specific response data
- Ensuring consistent test results across multiple runs
How to Attach Mock Tool Data to Your Agent
There are two ways to set up mock tools for your agent:- Auto-Fetch (Recommended): Automatically fetch tool configurations and generate mock data from your provider
- Manual Setup: Manually add tool configurations and mock data
Option 1: Auto-Fetch Tools (Recommended)
Auto-fetch reads your tool configurations from your provider (VAPI, Retell, or ElevenLabs) and uses AI to generate realistic sample input/output data based on your agent’s context and recent call transcripts.Auto-fetch is a read-only operation — it fetches tool definitions and populates mock data, but does not change any URLs or settings on your provider. Use the Mock Enable/Disable toggle (described below) to redirect your provider’s tools to Cekura’s mock endpoints.
- Your agent must have a provider configured (VAPI, Retell, or ElevenLabs)
- You must have entered an Assistant ID in your agent’s provider settings
-
Configure Your Provider Settings
- Go to the Cekura Dashboard and select your agent
- In the agent settings, configure your provider (VAPI, Retell, or ElevenLabs)
- Enter your Assistant ID (or Squad ID for VAPI squads) in the provider settings
-
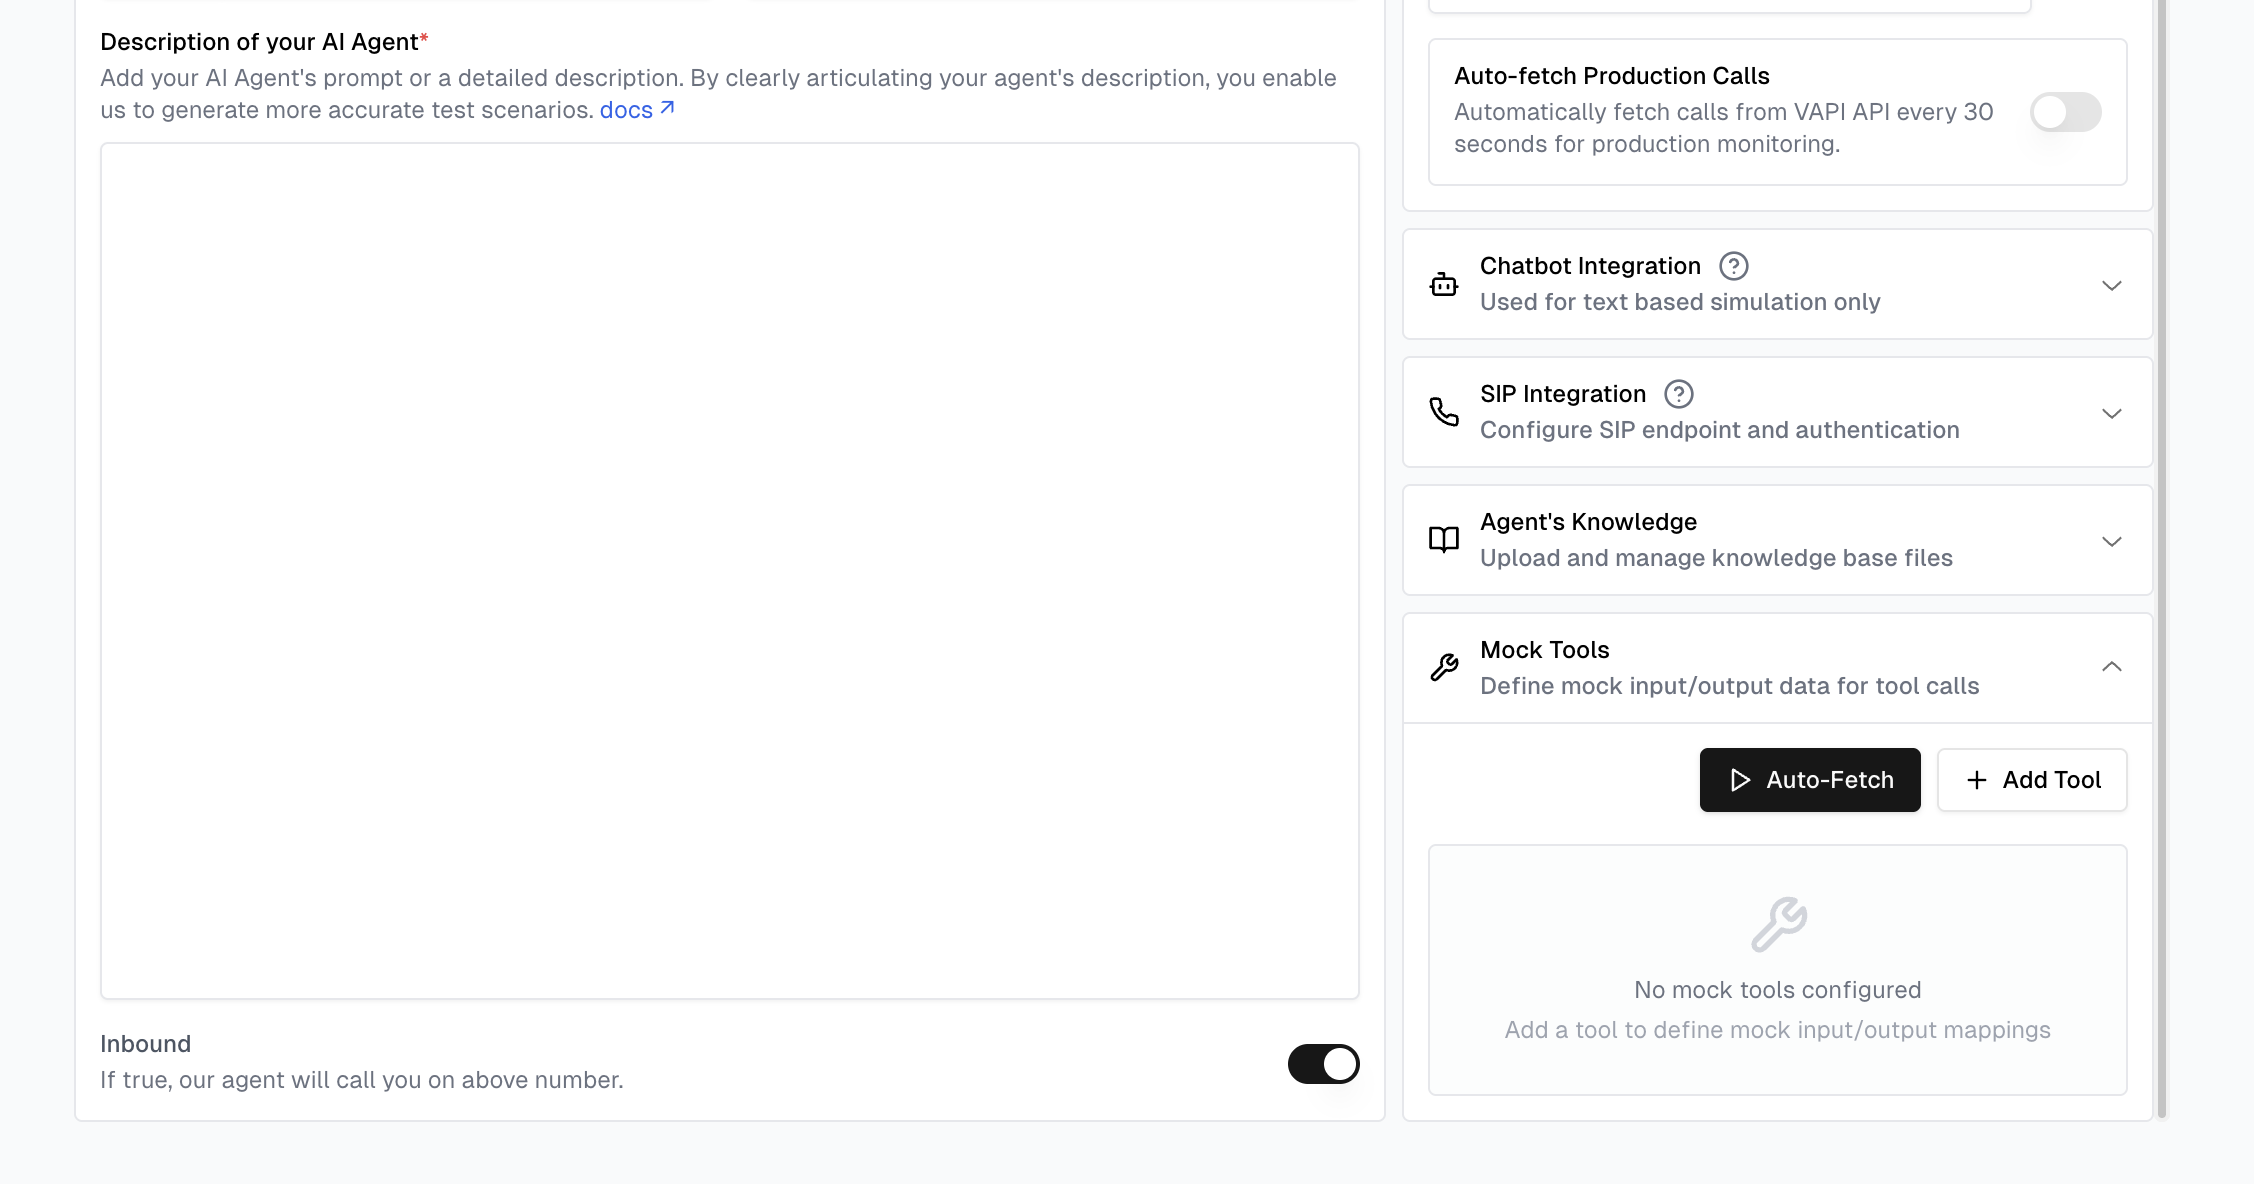
Open Mock Tools Section
- Scroll to the right-hand panel of the agent settings page
- Click on Mock Tools to expand the section
-
Click Auto-Fetch
- Click the “Auto-Fetch” button
- A confirmation dialog will appear explaining what will happen
- Click “Auto-Fetch” to confirm
-
What Happens:
- Cekura fetches all tool configurations from your provider
- AI generates realistic sample input/output data based on your agent’s context and recent call transcripts
- The generated mock data is saved to your agent in Cekura — your provider’s configuration is not changed at this point
Auto-fetch supports VAPI (including squads), Retell, and ElevenLabs providers. For VAPI squads, tools from all member assistants are fetched and prefixed with the assistant name to avoid naming conflicts (e.g.,
SalesAssistant_check_availability).LiveKit: Auto-fetch is not supported for LiveKit. To use mock tools with LiveKit, you can manually create mock tools and integrate the Cekura SDK in your LiveKit agent. See the LiveKit Tracing guide for setup instructions.Viewing Generated Mock Tool Data
When Auto-Fetch generates mock data for scenarios whose agent has mock tools attached, the expected mock tool calls are stored on each scenario asgenerated_mock_tool_entries. This data includes:
- Tool ID: The identifier for the mock tool
- Tool Name: The name of the tool being mocked
- Expected Input: The input parameters the tool expects
- Expected Output: The response the tool will return
- Via the Evaluator UI: When viewing a scenario in the Cekura dashboard, the generated mock tool entries are displayed so you can see what tool calls the evaluator will make during testing
- Via the API: Retrieve a scenario using the scenarios retrieve endpoint to access the
generated_mock_tool_entriesfield programmatically
Enabling and Disabling Mock Mode
After running Auto-Fetch, use the Mock toggle to control whether your provider’s tools are redirected to Cekura’s mock endpoints. Mock toggle is disabled by default — your provider’s tools continue using their original URLs until you explicitly enable it. To enable mock mode:- In the Mock Tools section, flip the Mock toggle to enabled
- A confirmation dialog will describe what will change
- Confirm to activate — Cekura will update your provider’s tool configuration:
- VAPI: Creates cloned tools with Cekura mock URLs (original tools are preserved since VAPI tools are shared globally)
- Retell: Updates tool URLs directly in your LLM/Flow configuration
- ElevenLabs: Updates webhook tool URLs directly in your agent configuration
- Flip the Mock toggle back to disabled
- Confirm the dialog — Cekura will restore your provider’s original tool configuration:
- VAPI: Deletes the cloned mock tools
- Retell/ElevenLabs: Restores the original tool URLs
Option 2: Manual Setup
If you prefer to manually configure your mock tools, or need more control over the mock data, you can add tools manually. Provide Agent tool details with mock tool data:-
Navigate to Agent Settings
- Go to the Cekura Dashboard
- Select the agent for which you want to add mock tools
-
Add Mock Tool Data
- On the right-hand panel, click on Mock Tools
- Click ”+ Add Tool” button to add mock tool data
- For each tool you need to add:
- Tool Name: Must be the same as mentioned in the agent description
- Tool Description: Describe what the tool does
- Input/Output Mock Data: Provide sample data to define the format for keys and values (this also serves as initial test data)
The tool name must exactly match what’s mentioned in your agent description. Any mismatch will result in the mock tool not being triggered during testing.
Example Mock Tool Configurations
Step 2: Create New Evaluators
After setting up your mock tools, create evaluators to test your agent:- Navigate to Evaluators Section
- Go to the Evaluators tab in your Cekura dashboard
- Click on “Create New Workflow Evaluator”
Step 3: Run the Evaluators
Execute your evaluators to test the agent with mock tools:-
Enable Mock Mode
- If you used Auto-Fetch: make sure the Mock toggle is enabled so your provider’s tools are redirected to Cekura’s mock endpoints
- If you used Manual Setup: configure your agent with Cekura’s mock tool endpoints instead of the actual tool URLs on your provider. Each tool’s endpoint URL is shown in the dashboard and returned as
mock_tools[].served_via.urlon the agent
-
Start Test Execution
- Select the evaluators you created
- Click “Run Evaluator” to start testing
- Choose the number of test iterations if needed
Handling Dynamic Input Parameters
When a mock tool is called during a test run, Cekura selects the variation whoseinput best matches the actual input the agent sends — it does not require an exact match. If you define multiple variations (for example, five entries for a make_payment tool with {"amount": 1} through {"amount": 5}), the one whose input is closest to what the agent sends at runtime is returned automatically.
To get reliable, predictable results across a range of input values:
- Provide multiple input-output entries. Each variation covers a different realistic input your evaluators exercise. Use Auto-Fetch — Cekura generates mock data from your agent’s real call history, giving you coverage of the input variations that actually occur.
- Pin dynamic values in your evaluator instructions. If a parameter like a date or appointment slot is completely open-ended, use Test Profiles to fix the value: set
{{test_profile.appointment_date}}in your evaluator scenario, and add a corresponding mock entry for that pinned value. This keeps both the mock response and the evaluator assertion deterministic. - Check the tool name matches exactly. Any casing or underscore mismatch between the tool name in your mock config and the name in your provider (Retell LLM/Flow, VAPI, ElevenLabs) will prevent the mock from firing, regardless of the input.
API Reference
For programmatic access to mock tools — they are managed directly on the agent:- Get Agent — read the agent’s
mock_tools(each entry includes its mock data and runtime access URL) - Update Agent — create, update, or delete mock tools via the
mock_toolsfield - Auto-Fetch Agent from Provider — re-fetch the agent’s full configuration (including tools + mock data) from its provider
- Toggle Mock Tools — enable or disable mock mode on the provider