Video Tutorial
Watch this video to see the VAPI integration in action:You can test your agents directly on our platform without configuring API
keys. Cekura will use internally generated transcripts for testing purposes.
For a simpler setup without API keys, check out our guide on testing custom
agents.
Prerequisites
To successfully integrate your VAPI agent, you will need the following:- A Cekura account
- A VAPI account with a deployed Voice Assistant.
- Your VAPI Private API Key (for Cekura’s Organization or Project Settings).
- Your VAPI Assistant ID (for the Cekura Agent configuration).
Testing with VAPI
This guide walks you through setting up and testing your Voice AI agents built on the VAPI platform using Cekura. By linking your VAPI Assistant to Cekura, you can run automated test suites, analyze call performance, and ensure agent quality.- Voice
- Chat
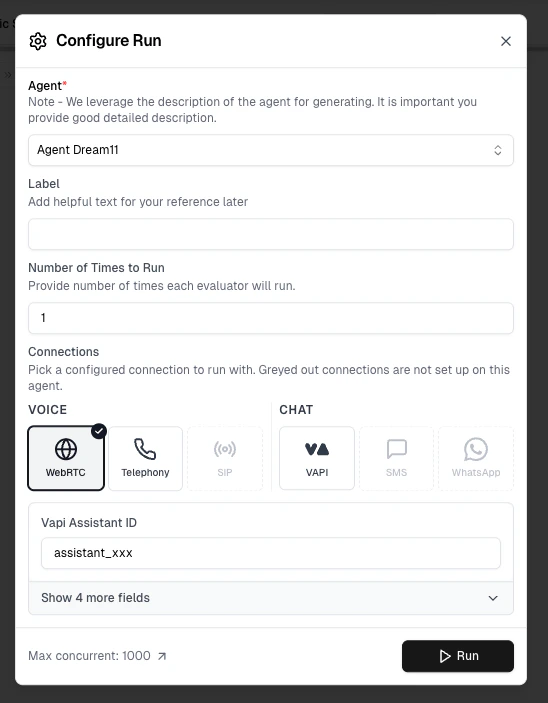
- WebRTC
Test your VAPI voice agents with automated call simulation.
1
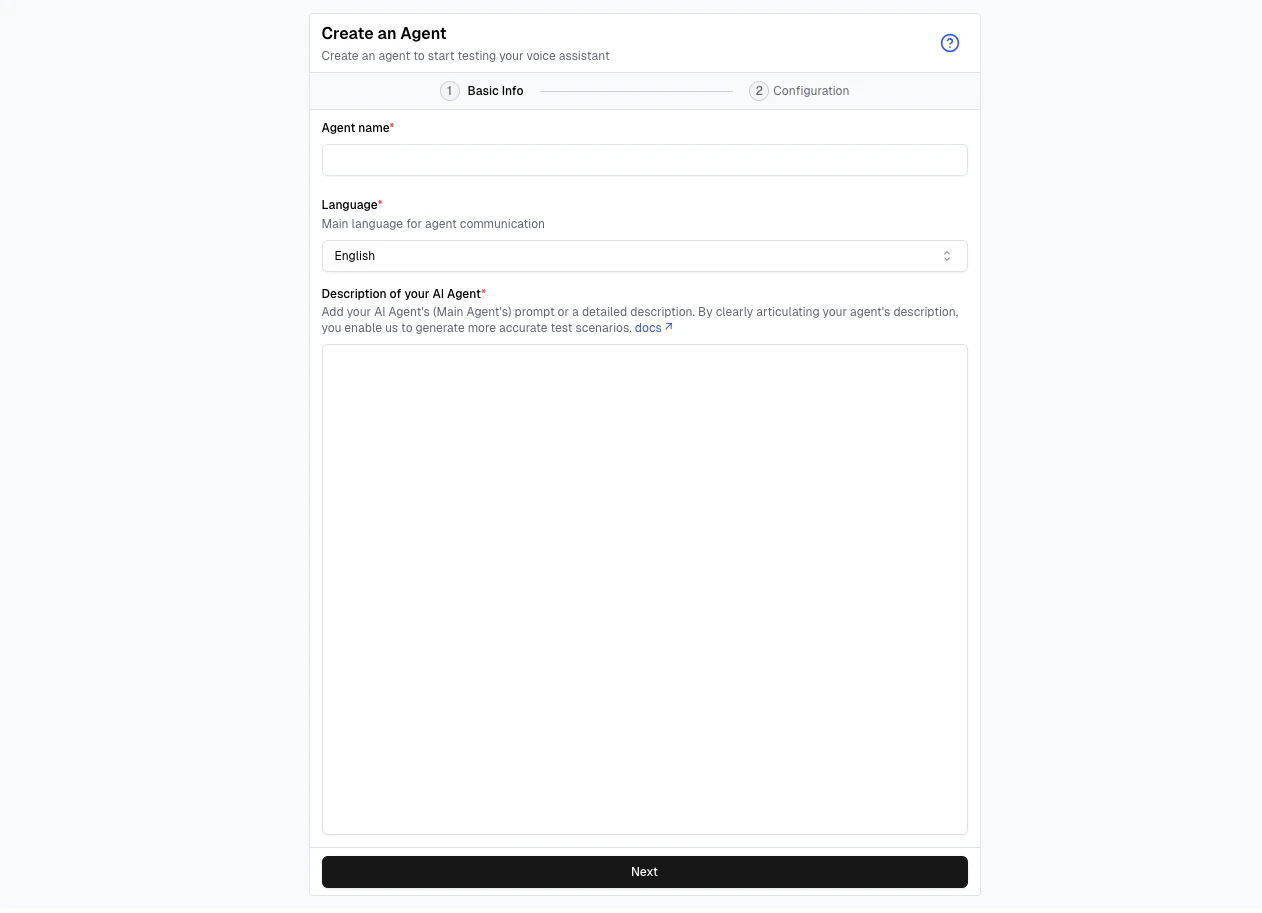
Create a New Agent
- Navigate to the Agents section from the left navigation bar.
- Click the Create Agent button in the top right, or click Create your first agent if you’re new.
-
Fill in the Agent name, Language, and Description of your AI Agent, then click Next.
2
Configure Agent Settings
- In the Provider panel on the right, select VAPI.
- Under Integration Settings, enter the External Assistant ID of your VAPI agent.
- Enter your VAPI Private API Key in the designated field.
-
Click Save Changes.
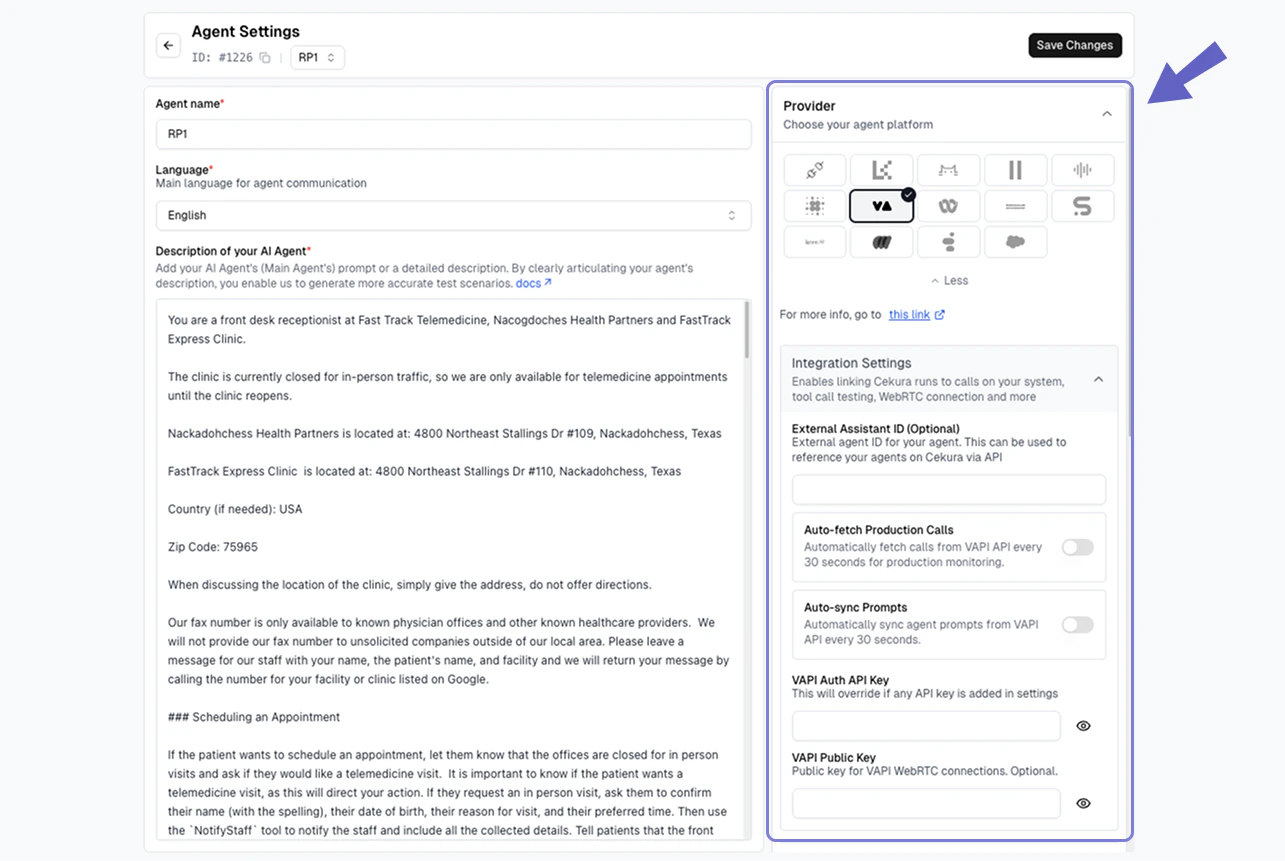
Note: The VAPI Assistant ID is required to link a specific agent, and the VAPI Private API Key is required for Cekura to authenticate and communicate with VAPI.
3
Run Your First Test
Once your VAPI Agent is configured:
- Go to Simulation → Evaluator.
- Click Generate Evaluators to auto-create some scenarios (or create one). You can also use the Infrastructure Suite to instantly add 18+ pre-built test cases covering latency, audio quality, and interruption handling.
- Choose a Scenario from the list.
-
Click the Play button (▶︎) next to it to open the Configure Run dialog. Under Connections, select Telephony and enter your phone number.
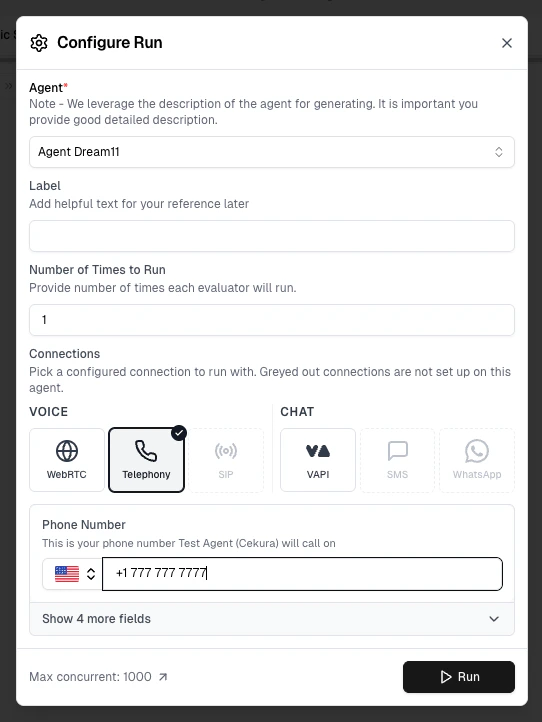
Note: Greyed out connections are not configured, set them up in your Agent Setting’s Provider panel if you want to run with SIP.
4
Monitor Your Test
- Monitor the test in Simulation → Runs Overview.
- View transcripts, audio, and metrics in Results.
- Use Re-run Failed or Lab → Optimize to refine and rerun.

Value of VAPI Integration
Integrating your VAPI Assistant with Cekura unlocks powerful testing and observability features:- Detailed Tool Call Information: You are able to see granular data on tool calls made by your VAPI agent during a conversation, which is critical for debugging complex workflows.
- Metadata Access: You are also able to access any metadata available from VAPI calls, enabling richer, context-aware evaluations of agent performance.
-
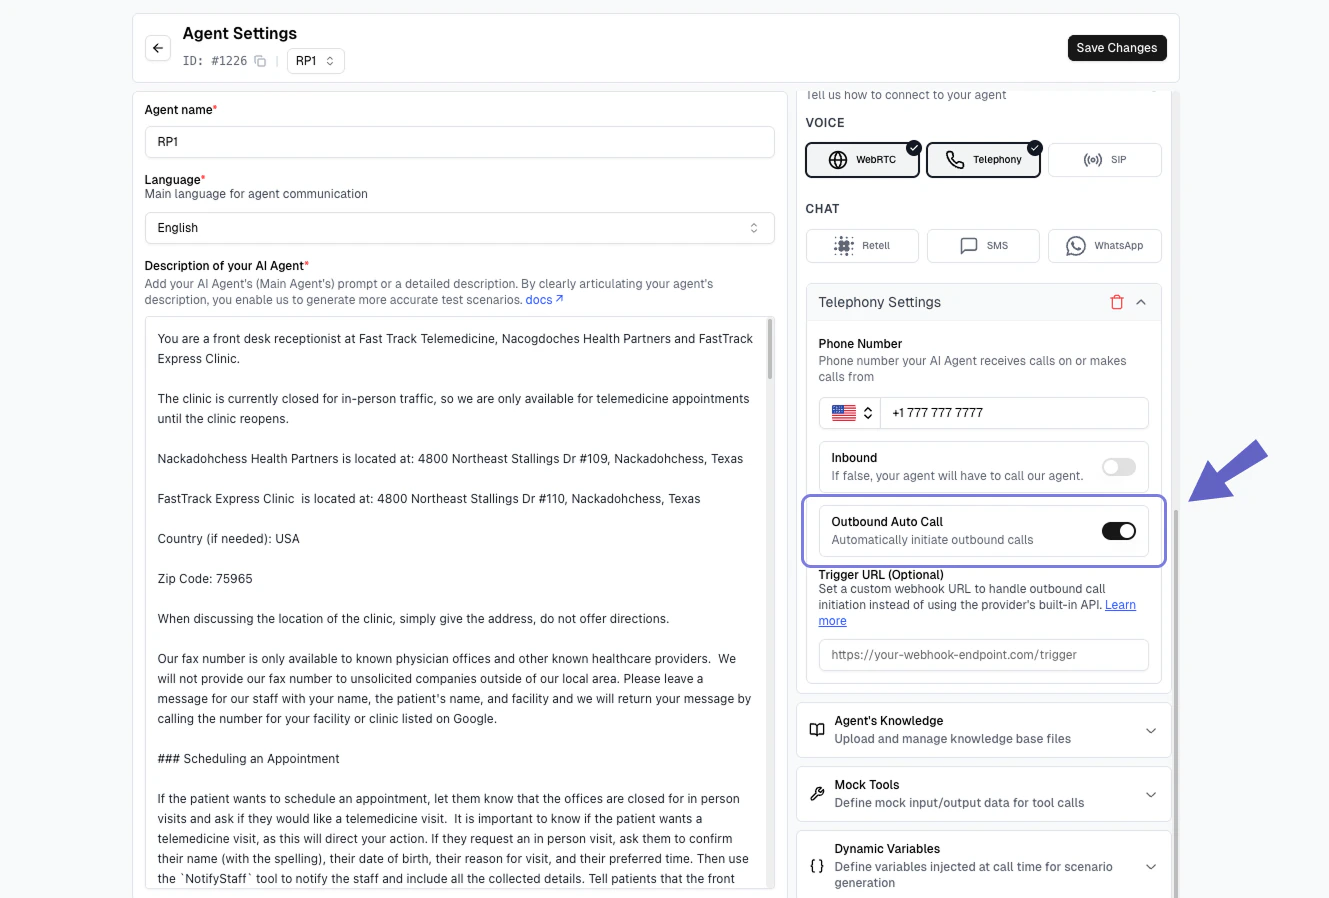
Automated Outbound Calling: You can use Cekura’s infrastructure for automated outbound calling to run large-scale, performance-driven test campaigns.
Setting Up VAPI Integration (Across Agents)
Setting Up VAPI Integration (Across Agents)
This setup is recommended as it configures your VAPI API Key once, making it available across all agents within your project. If you complete this step, you will not need to enter the API Key when creating subsequent VAPI agents.
- Log in to your Cekura Dashboard.
- Click on the Settings button (usually on the top right of the navigation bar).
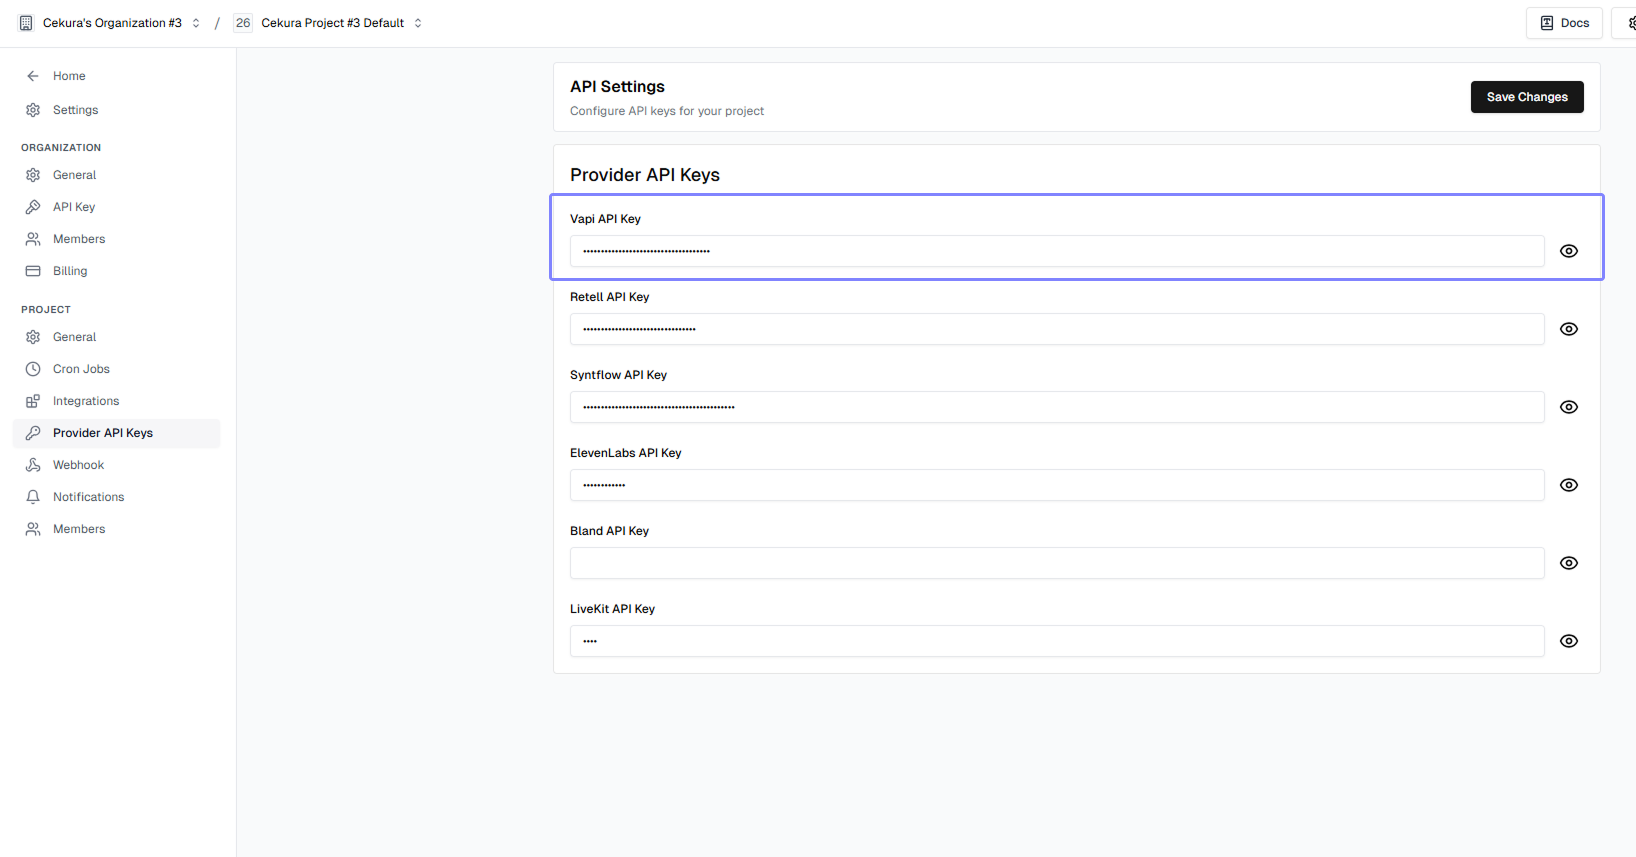
- Navigate to the Provider API Keys tab.
- Locate the VAPI section.
- Enter your VAPI Private API Key in the designated field.
-
Click Save Changes.
Mock Tools (optional)
If your VAPI agent calls tools, you can test it without hitting live services using Mock Tools. Use Auto-Fetch to pull your VAPI tools and generate mock data, then enable the Mock toggle — Cekura creates cloned tools pointing at its mock endpoints (your original tools are preserved) and restores them when you disable the toggle. VAPI’s end-of-call report already includes the tool calls your agent made, and Cekura extracts those into the transcript automatically. So the Mock Tool Call Accuracy metric works out of the box — unlike a custom integration, you don’t assemble or send the transcript yourself.Next Steps
- Learn about custom metrics
- Explore predefined metrics
- Set up instruction following metric