Overview
Learn how to monitor, analyze, and optimize your VAPI-based voice agents using Cekura’s observability tools. This guide will walk you through setting up and configuring your VAPI integration.- Auto-fetch
- No-code VAPI Integration
- Forwarding VAPI respone
Auto-fetch is the simplest way to get VAPI calls into Cekura. When enabled, Cekura pulls your call data from VAPI every 30 seconds—no webhook configuration required.
1
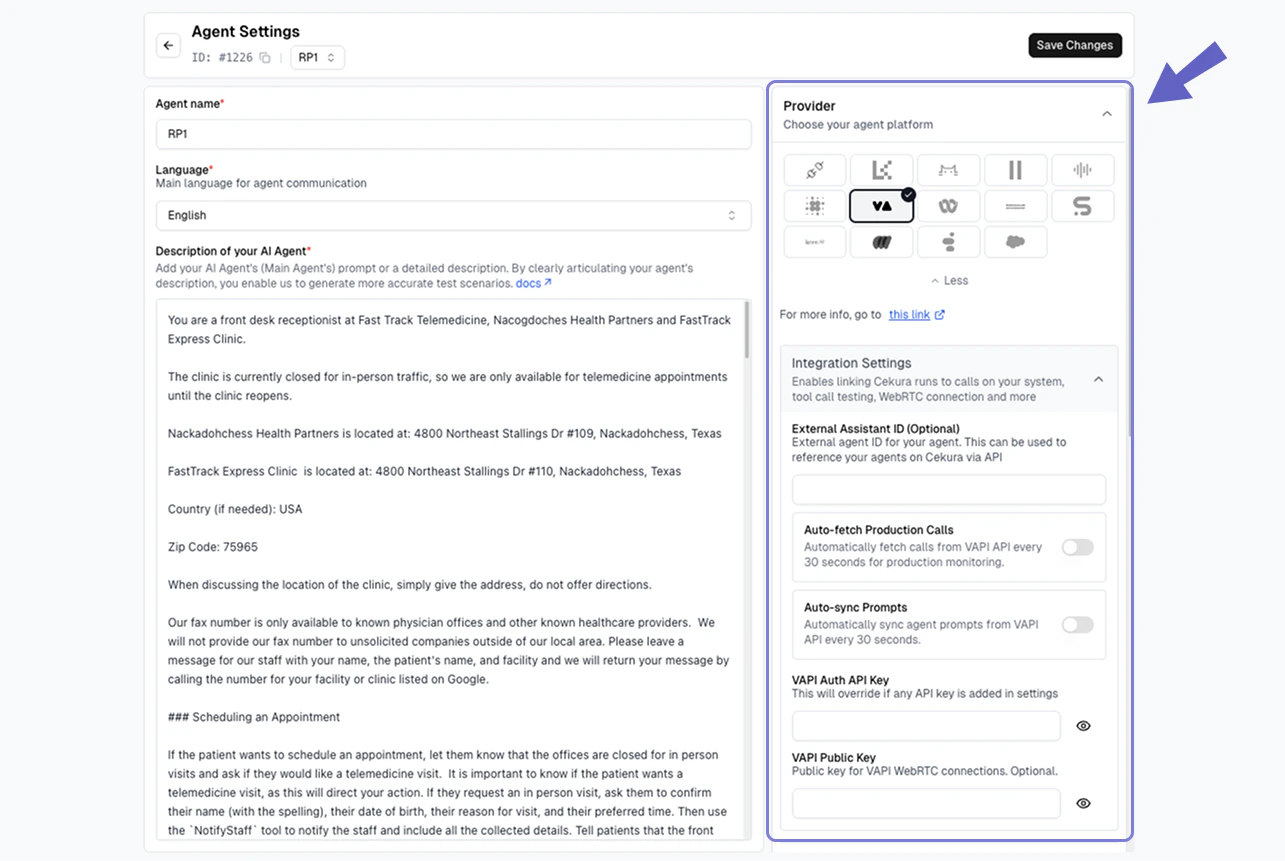
Create or select an agent
In your Cekura dashboard, create a new agent or select an existing one with VAPI as the voice provider.
2
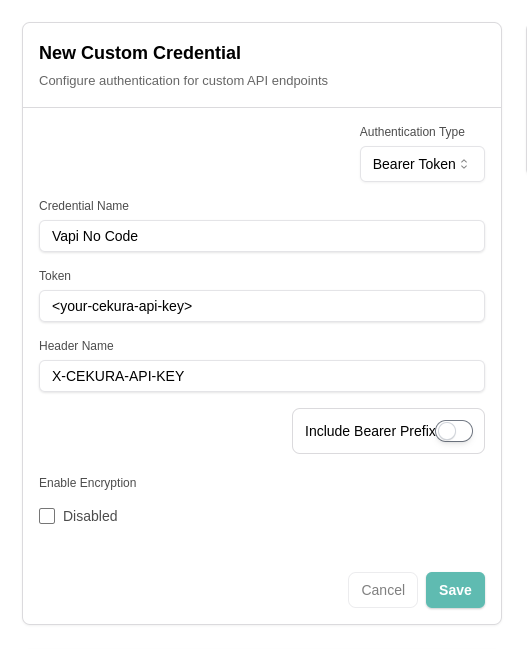
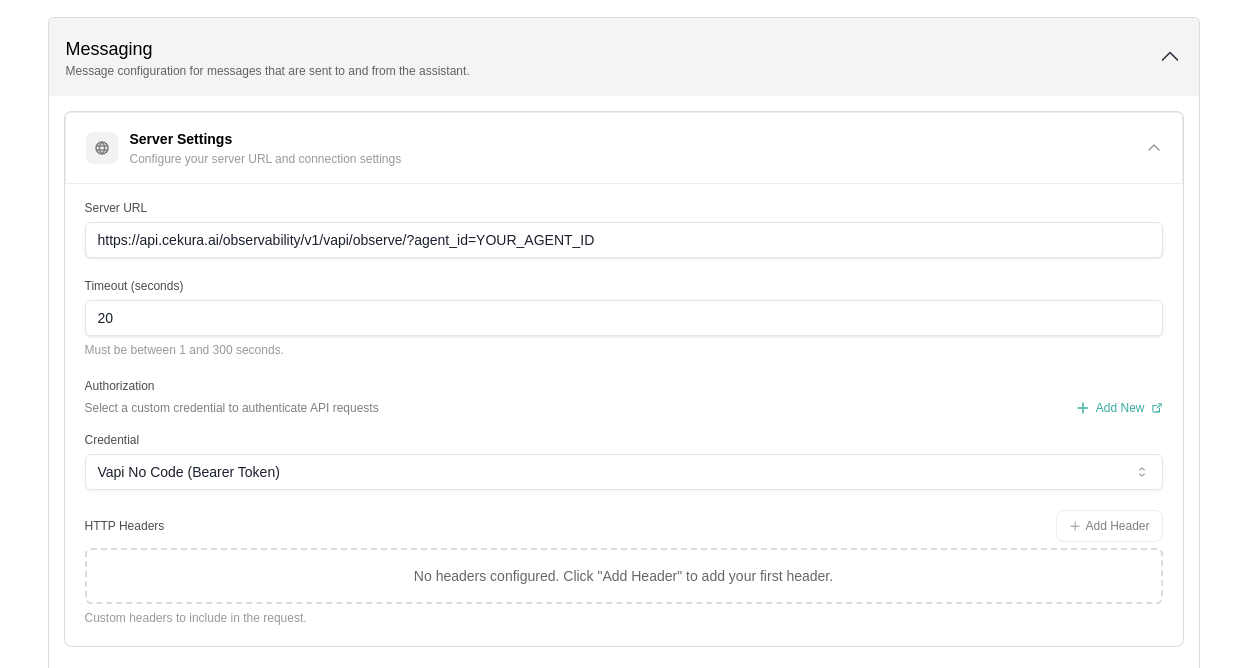
Add VAPI credentials
In the Agent Settings page:
- Select VAPI as the voice integration provider
- Add your VAPI API key
- Enter your VAPI Assistant ID
3
Enable auto-fetch
Toggle on Auto-fetch Production Calls in the voice integration settings.
4
Test your integration
Make a test call from VAPI. Within 30 seconds, your call should appear in the Cekura observability
Calls section.