Overview
Test your LiveKit agents with automated room and token management. Cekura handles room creation and token generation automatically.- No-code
- Code
Run tests directly from the frontend without writing code.
1
Configure LiveKit credentials
Go to your agent settings and configure LiveKit integration: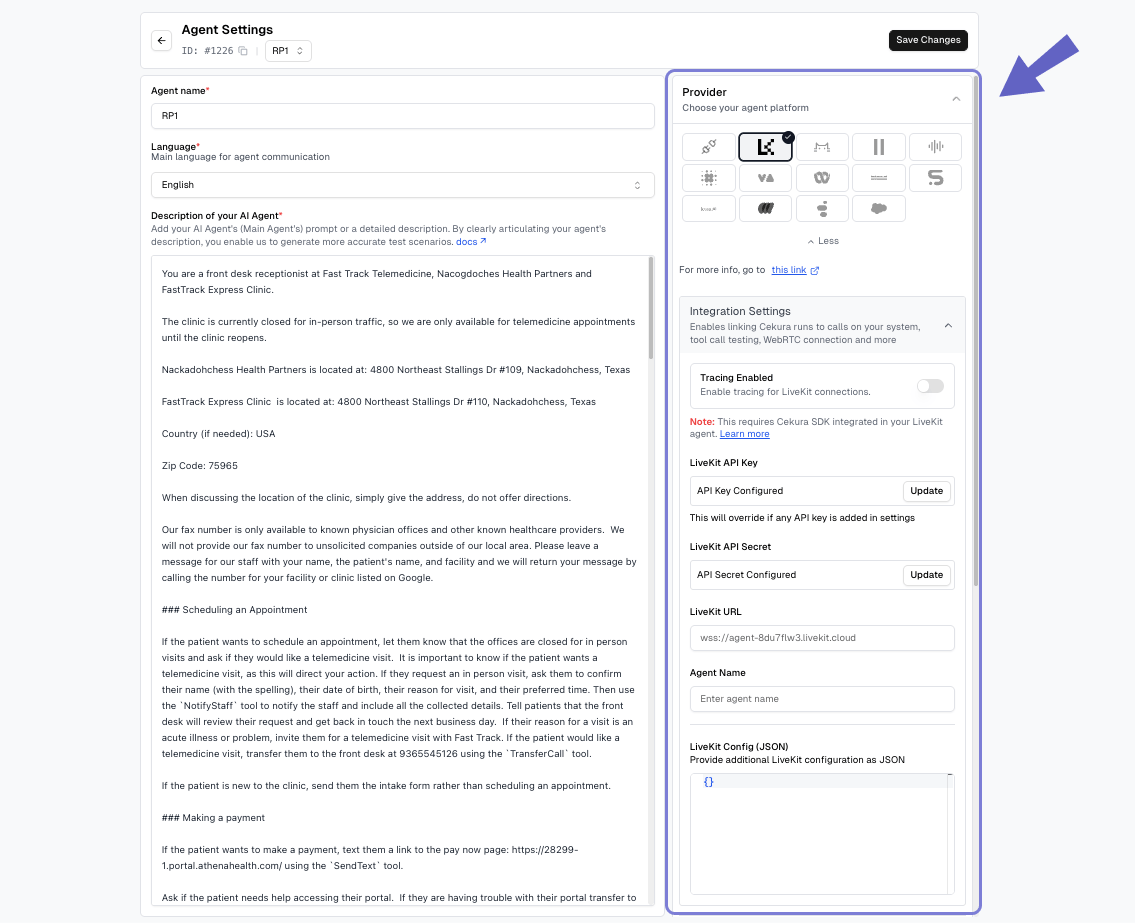
- Provider: Select LiveKit from the dropdown
- LiveKit API Key: Your LiveKit API key
- LiveKit API Secret: Your LiveKit API secret
- LiveKit URL: Your LiveKit server URL (e.g.,
wss://your-server.livekit.cloud) - Agent Name: The specific agent name to dispatch in LiveKit
- LiveKit Config (JSON): Additional room configuration parameters
Accessing Config in Your Agent:
Config parameters you might be using in your livekit agent’s code. The configuration JSON is stored in the LiveKit room’s metadata. Access it in your agent’s entrypoint:
2
Run tests from frontend
In the Configure Run dialog, select WebRTC under Voice connections and click Run.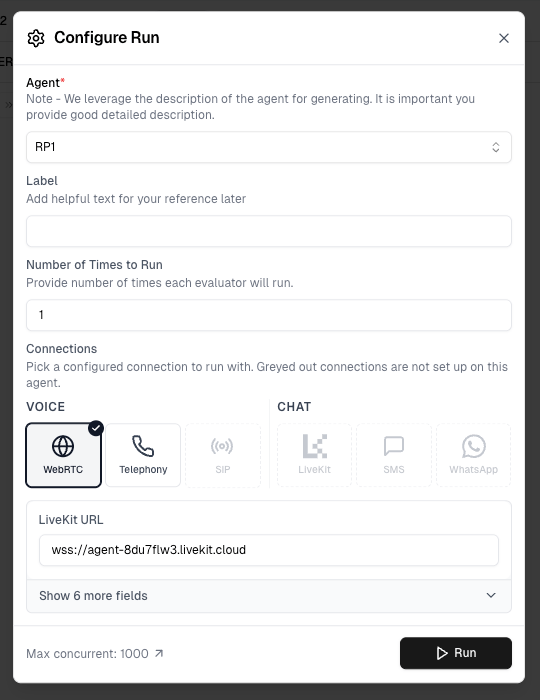
- Creates unique rooms for each scenario
- Generates access tokens
- Executes tests and cleans up resources
Greyed out connection options have not been configured in Agent Settings yet — set them up there to enable them.
3
View results
Results appear in your dashboard. Track test status, metrics, and conversation details in real-time.
Accessing Test Profile and Run Metadata in Your Agent
In the automated flow, Cekura creates the LiveKit room and dispatches your agent. During dispatch, Cekura populates the agent’s job metadata with test context that your agent code can use at runtime.Dispatch Metadata Structure
Extracting Job Metadata in Your Agent
Access the dispatch metadata viactx.job.metadata in your LiveKit agent’s entrypoint:
ctx.job.metadata contains test context from Cekura (scenario ID, run ID, test profile data). This is different from ctx.room.metadata which contains the LiveKit Config JSON.